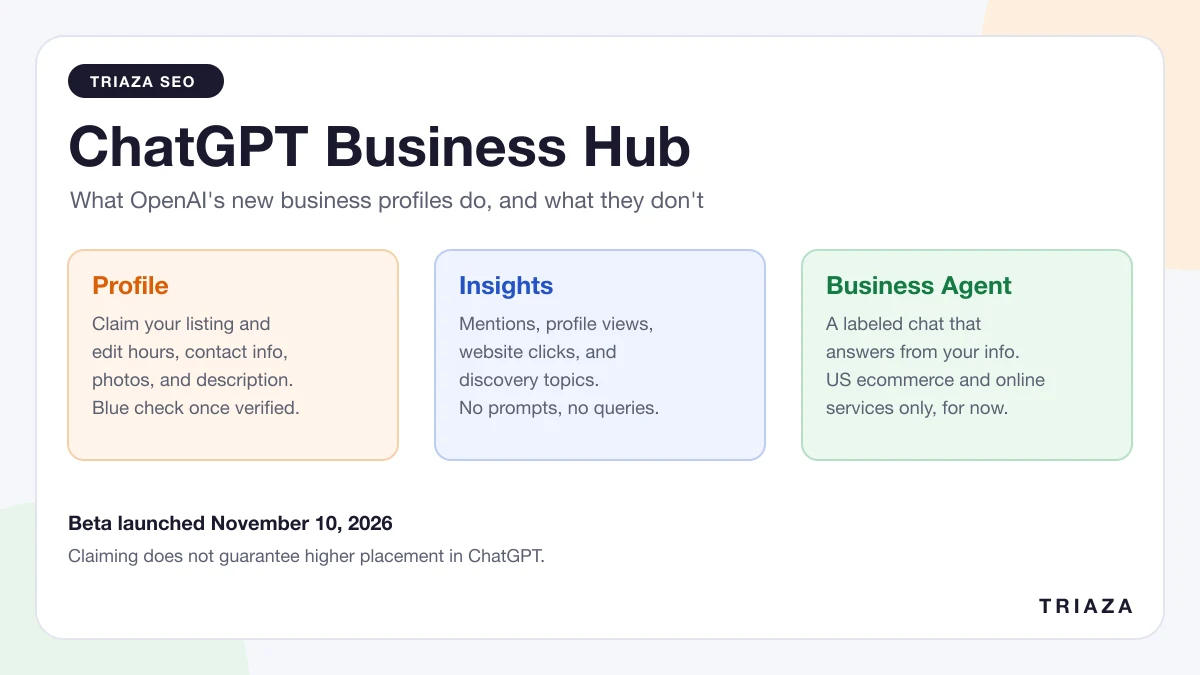
OpenAI opened Business Hub in beta on November 10, 2026. It’s the dashboard where a business claims its profile in ChatGPT, corrects its details, and sees how often it comes up in answers. We claimed Triaza’s profile the next day, and the screenshots below come from that account.
This post covers setup only. If you want to know what Business Hub is and whether it’s worth your time, start with what ChatGPT Business Hub does and doesn’t do.
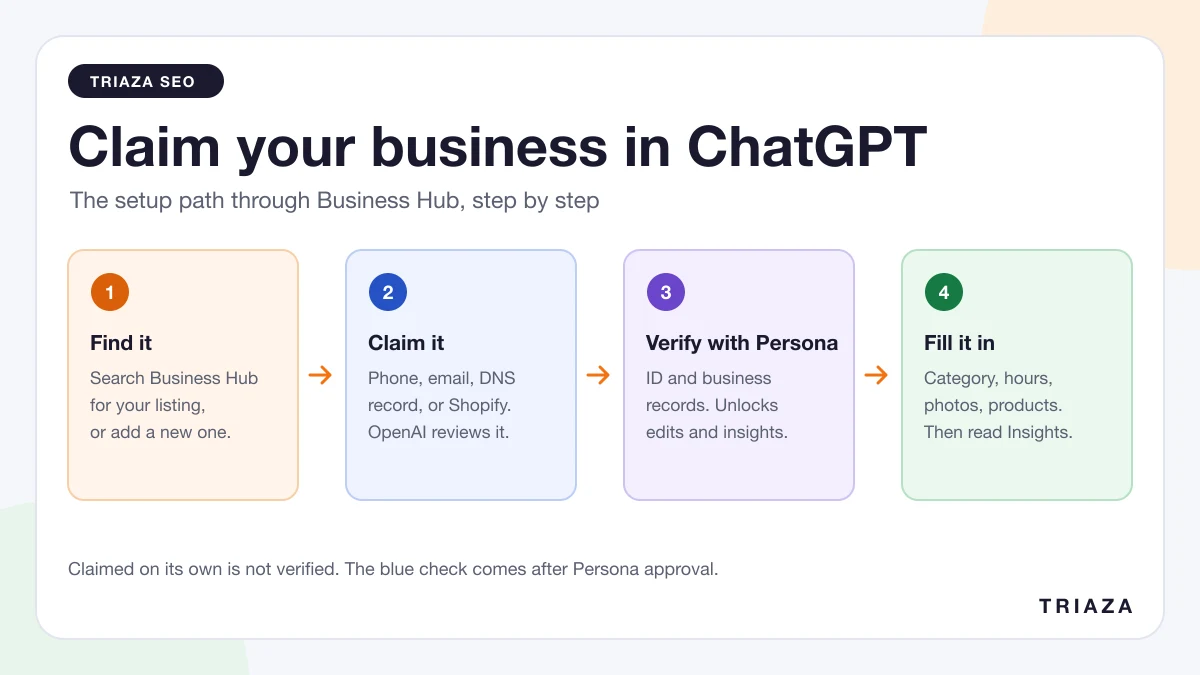
Go to chatgpt.com/business-hub, search for your business, and claim it with a code sent to your business phone or email, a DNS record on your domain, or a Shopify login. OpenAI reviews the claim. After that you complete identity verification with a company called Persona. You can’t publish edits, see insights, or get the blue check until that verification is approved. You don’t need an Ads account or an Enterprise agreement, and OpenAI lists no fee.
What to have ready before you start
This list comes from OpenAI’s setup article.
- The right ChatGPT account. You’ll confirm which account manages the business, and later invitations can depend on that choice. OpenAI notes that for a business claimed inside a ChatGPT workspace, invitees may need to be members of that workspace. Decide on purpose instead of using whichever account happens to be signed in.
- Authority to represent the business. You must own it or be authorized to act for it.
- Access to one verification channel. That means the business phone line, a business email inbox, your domain’s DNS settings, or the Shopify store’s login.
- Documents for Persona. OpenAI says you may need a government-issued ID, business registration information, and proof that you’re authorized to represent the business.
You don’t need a ChatGPT Ads account or an Enterprise agreement.
Step 1: Find your business in Business Hub
Sign in to ChatGPT and open Business Hub from the sidebar, or go straight to chatgpt.com/business-hub. Select Add, then type your business name into the search box.
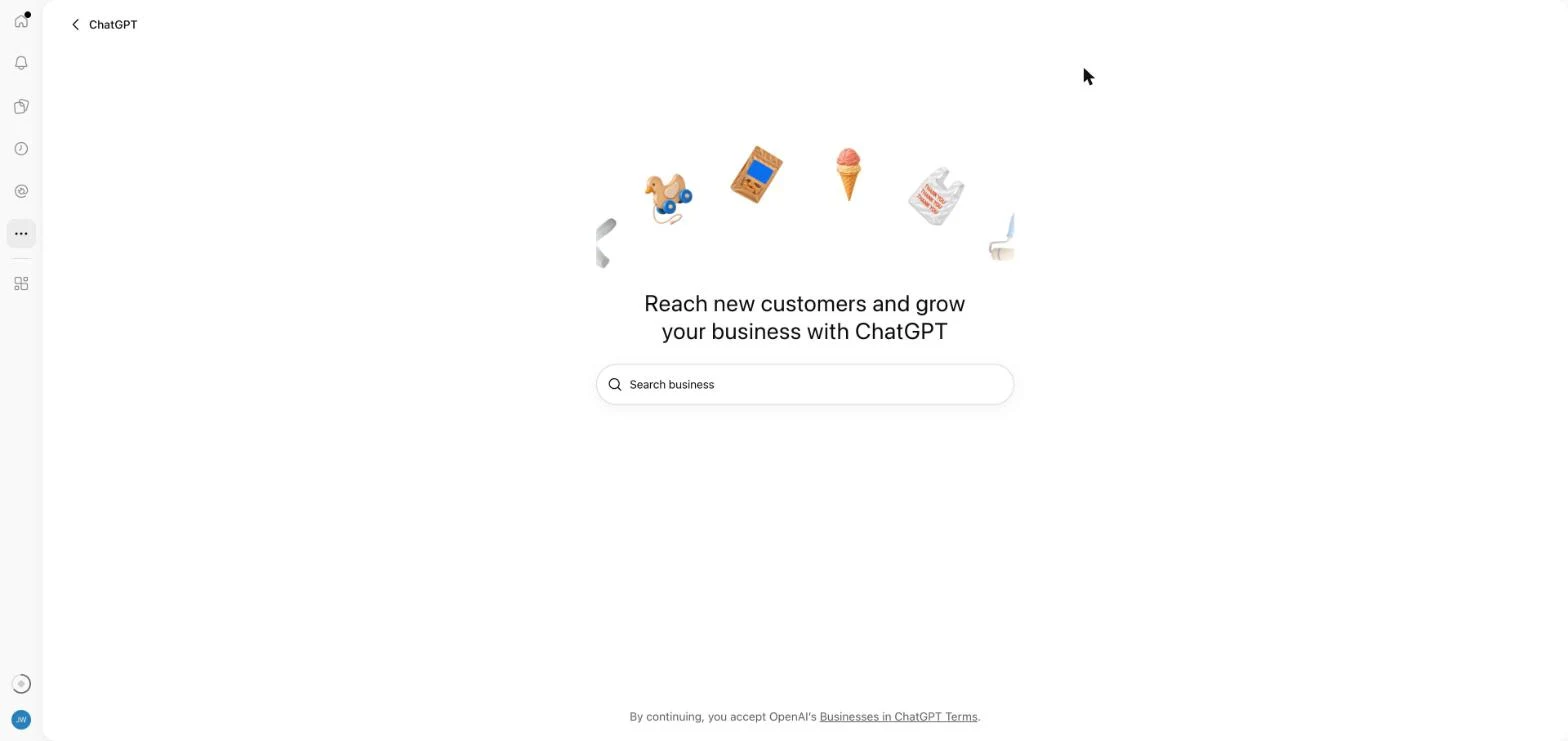
ChatGPT already holds listings for some businesses. Ours was there, with the street address attached:
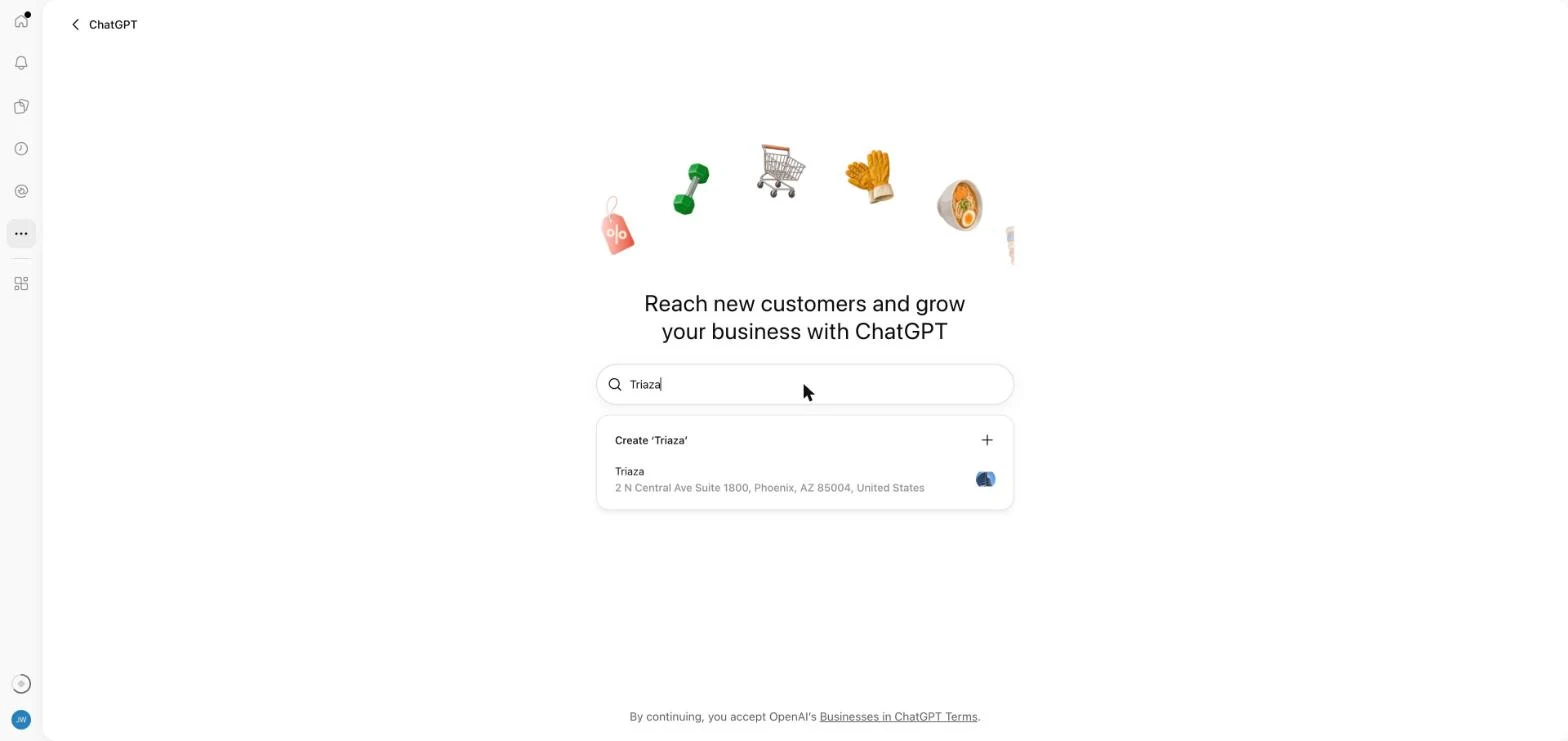
Pick the listing that matches and confirm the ChatGPT account that will manage it. A few situations change this step:
| What you see | What it means |
|---|---|
| Your listing | Select it and continue to verification. |
| No listing, but a “Create” option | Eligible online businesses can add a new profile. |
| No listing and you run a local store or restaurant | OpenAI says these “can currently claim only an existing U.S. listing,” so there’s nothing to claim yet. |
| Contact support on the listing | The listing is locked. Use that button to request access. |
| A claim invitation in your email | Open the personal link and sign in with the address that received it. Don’t forward it. |
Check for duplicates before creating anything. OpenAI’s Businesses in ChatGPT policy prohibits duplicate profiles, and a published profile can’t be deleted later.
Step 2: Verify your claim
OpenAI names four verification methods, and Business Hub shows only the ones available for your business.
| Method | What you do | What you need |
|---|---|---|
| Business phone | Choose a text message or an automated call, select Get code, and enter the code | Someone answering the business phone |
| Business email | Select Get code and enter the code | Access to the email address associated with the business |
| Website domain | Add the TXT record ChatGPT shows you to your domain’s DNS, then return and select Verify domain | Access to your DNS provider, or someone who has it |
| Shopify store | Select Connect Shopify, review the permissions, and log in to the store | The login for the Shopify store you’re claiming |
A few notes on the domain method:
- Copy the record’s type, name (or host), and value exactly as Business Hub shows them. Third-party guides published this week don’t even agree on what the record is called, so trust your screen over anyone’s screenshot.
- Many DNS providers add your root domain to the host field automatically. If yours does, enter only the prefix. Pasting the full name gives you a record at
prefix.yourdomain.com.yourdomain.com, and verification fails. Delta V Digital’s walkthrough flags the same trap. - Early guides report that the record expires, though they disagree on how soon. Add it in the same sitting instead of leaving the tab open overnight.
- DNS changes may take time to appear. If Verify domain fails right after you save the record, wait and try again before assuming something is wrong.
If the phone number or email OpenAI has for your business is out of date, you may not be able to receive the code. In that case the domain method is the one you control.
Step 3: Wait for claim approval
OpenAI reviews the claim and emails a decision or a request for more information. It doesn’t publish a review time; its help article says only that it varies. Birdeye’s test saw a claim approved in about two hours, while other guides tell readers to allow longer. You can cancel a pending claim with Cancel claim.
If the claim is still pending, don’t submit it again. OpenAI’s instruction is to wait for the review to finish before retrying.
Step 4: Complete identity verification with Persona
An approved claim lets you open the business in Business Hub, and not much more. Publishing changes, connecting a product feed, viewing insights, and building an agent all require a second check through Persona, a third-party identity verification service.
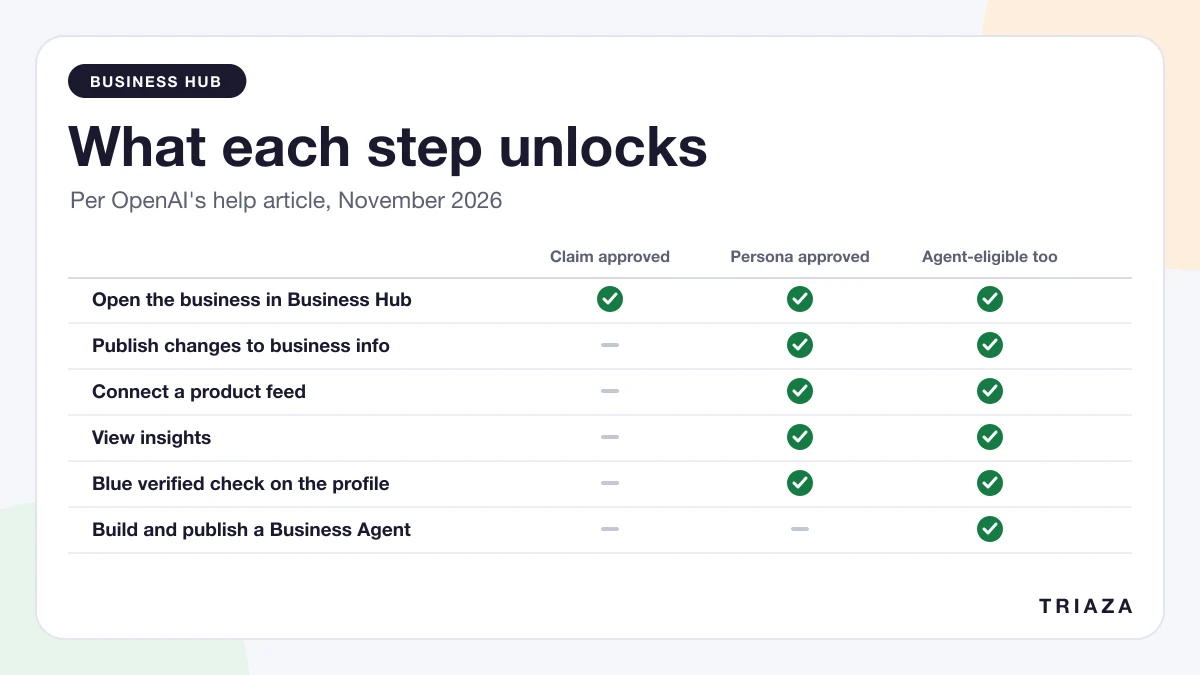
Select Verify with Persona, then Continue to Persona, and submit what Persona asks for. If you skipped that step during the claim, open your profile from the Business tab and look for Complete verification with Persona in the overview.
Before you start:
- The details must match your records. OpenAI’s advice for failed checks is to make sure the business name, address, and any registration or tax number match your official business records. Have those documents open while you fill in the form.
- Submitting is not approval. Features stay locked until OpenAI approves the submission, and the decision comes by email.
- A new profile publishes automatically. If you’re creating a profile from scratch and verify through Persona, OpenAI’s approval publishes it. There is no separate publish step, and published profiles can’t be deleted, so don’t begin until the name and details are right.
The blue check is tied to this step. In the help article’s words, “Claiming your business alone doesn’t give its profile a verified badge.” OpenAI’s product page is looser and says the check shows a profile has “been claimed,” so go by the help article.
Step 5: Fill in your profile
Once both approvals are through, open the business and select Edit business info. The editor has five tabs, and a preview on the right shows the profile card as people will see it in ChatGPT.
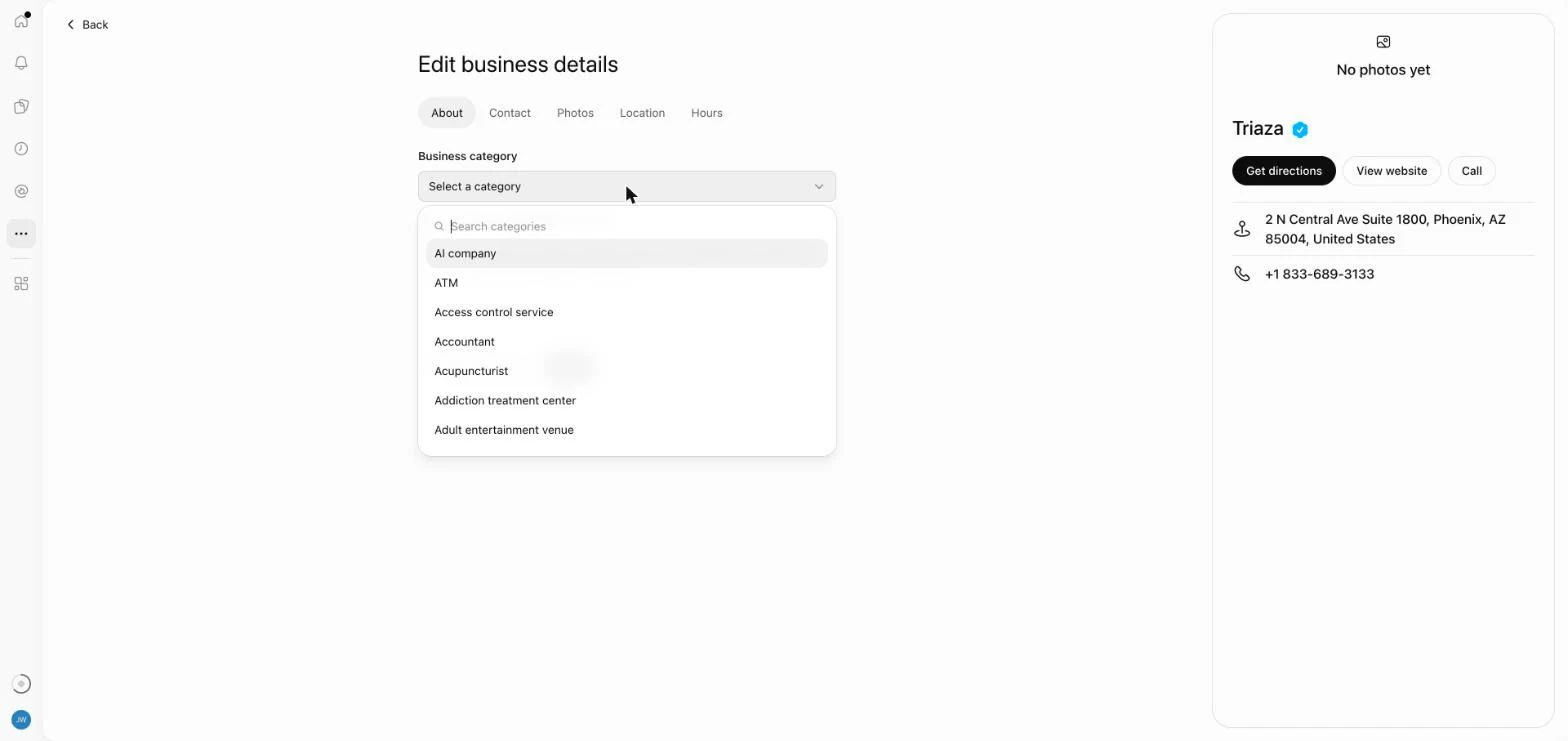
What each tab holds:
- About: a business category, plus an optional free-text field for anything else customers should know. The field’s own hint says ChatGPT can share that text in conversations “when helpful or relevant,” so write it the way you’d answer a customer.
- Contact: phone number, business email, and website.
- Photos: uploads for the profile. OpenAI’s help article also mentions a logo and cover photo.
- Location: street address and unit, with a map.
- Hours: opening hours for each day and a time zone.
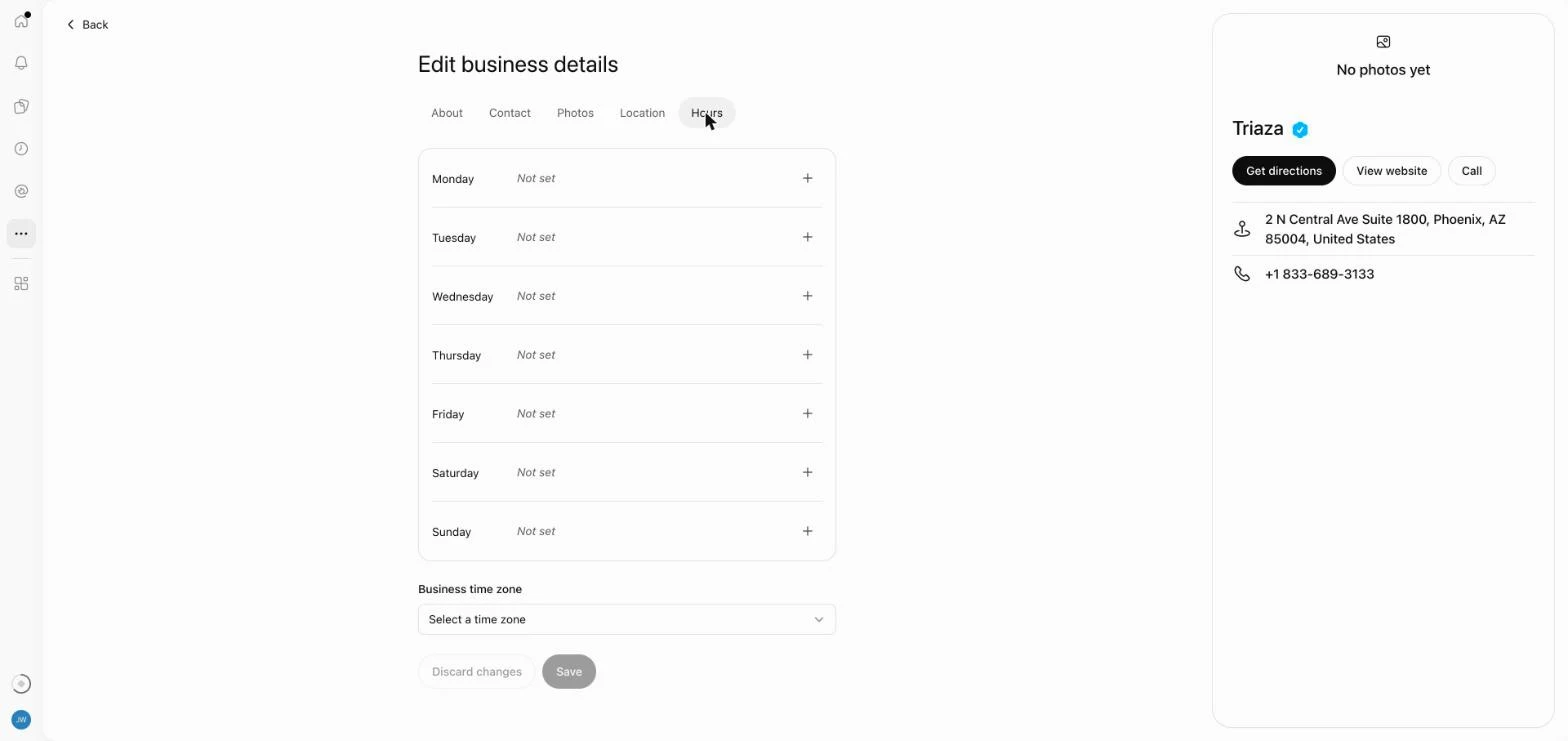
Our claimed profile arrived with an address, phone number, and website already filled in, and with no category, no hours, no email, and no photos. Assume yours has similar gaps and go through every tab.
OpenAI’s help article lists delivery and return policies among the editable details as well. Those matter most for stores, and they’re among the things a Business Agent draws on.
Edits don’t go live when you press Save. OpenAI reviews and publishes changes, and it warns that updates “can take time to appear in a listing or a ChatGPT answer.” ChatGPT may also keep using other sources about your business, which is a reason to make sure your website, Google Business Profile, and directory listings all say the same thing.
Step 6: Add products, if you sell them
The Products section is where retailers connect a product feed so ChatGPT has current prices and availability. Service businesses can skip this step.
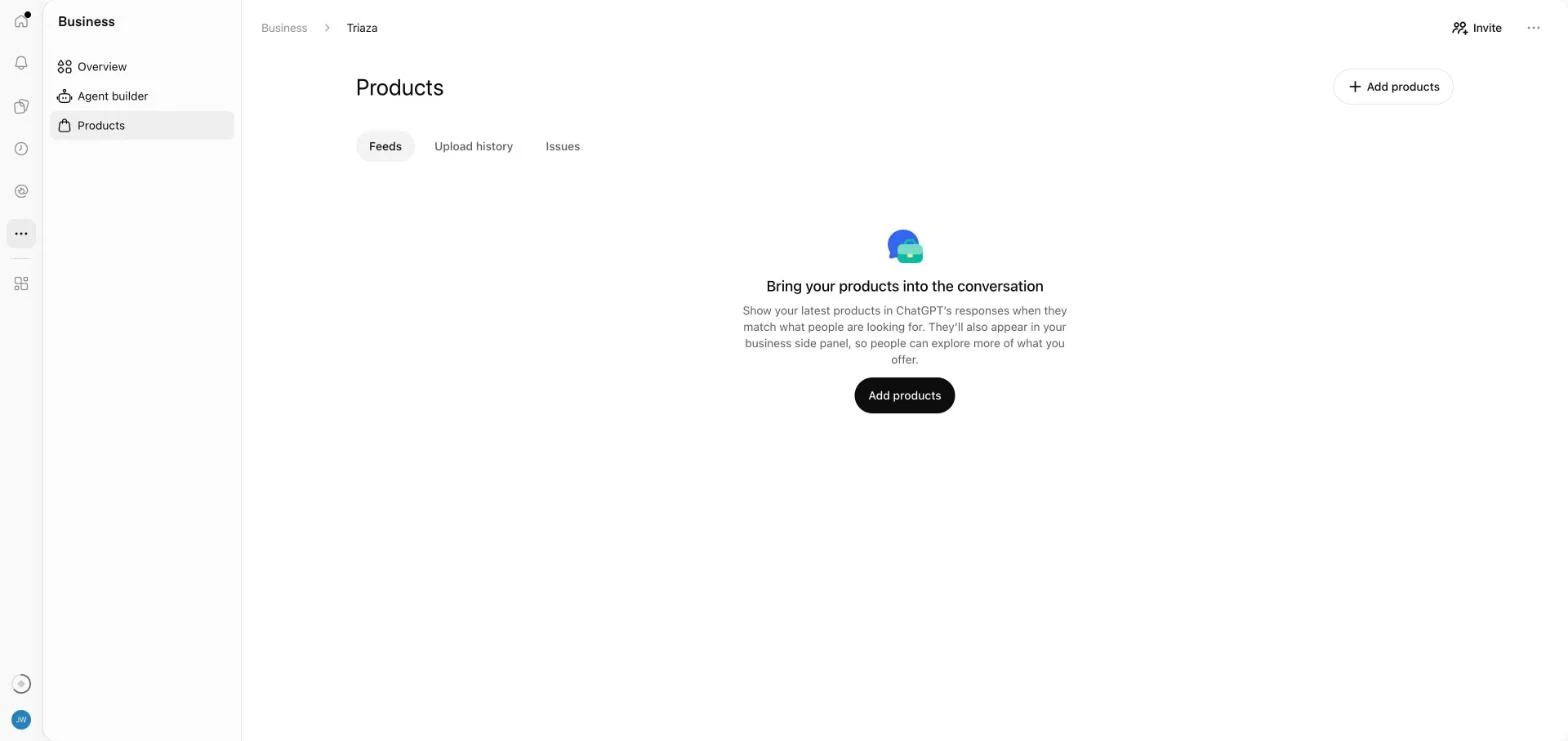
You have three routes: connect a Shopify feed, upload a CSV that follows OpenAI’s product feed specification, or give Business Hub a hosted URL that links to the feed file. Products have to comply with OpenAI’s Commerce policies.
OpenAI is plain about the limits here: connecting a feed “doesn’t publish an agent or guarantee that ChatGPT recommends your products.”
Step 7: Check your insights
The Overview page shows Brand insights for the last 7 or 28 days: mentions, profile views, and website clicks, followed by a chart and your top five discovery topics.
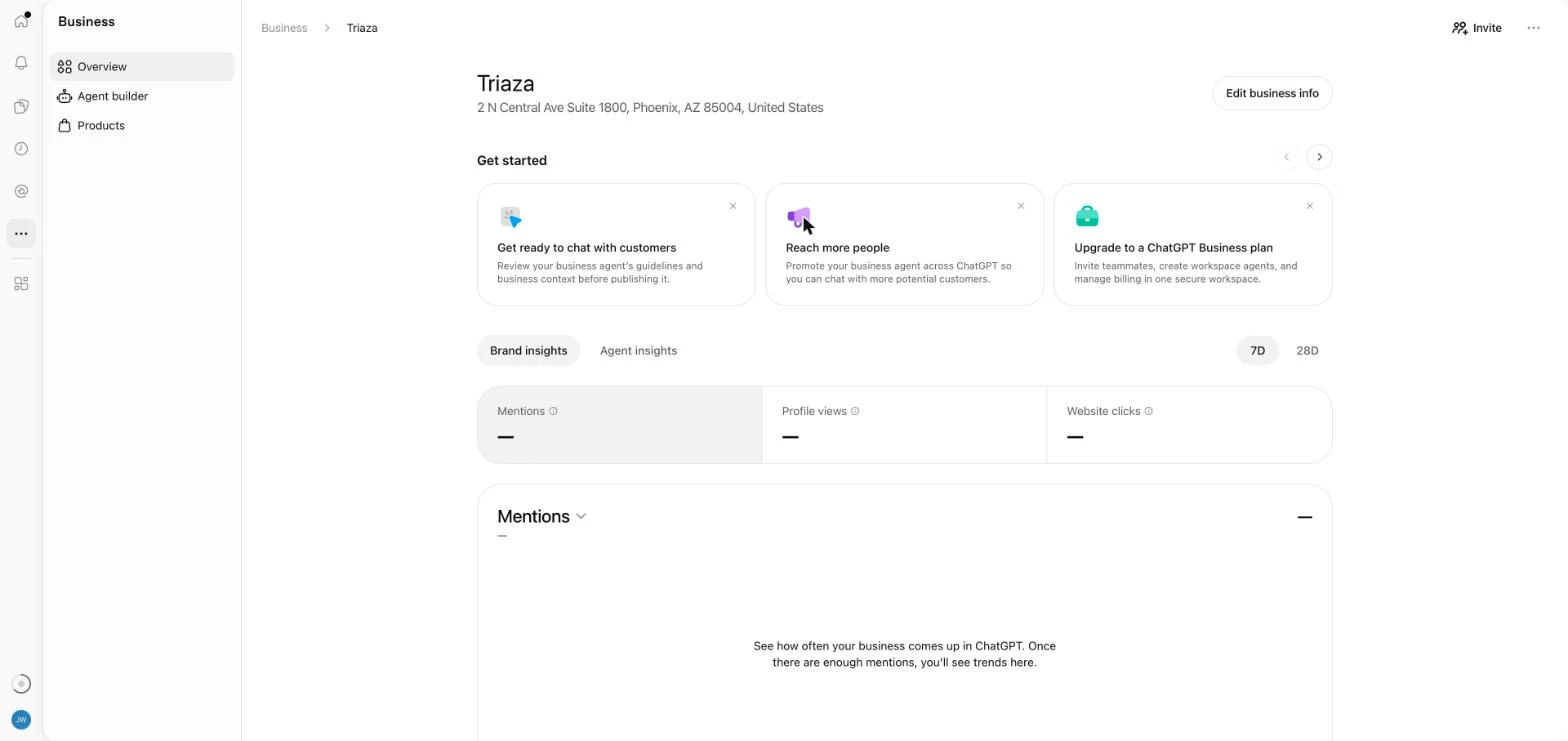
Expect dashes at first. A blank metric, according to OpenAI, can mean activity hasn’t reached the reporting threshold, data is still being collected, or reporting is unavailable. It “doesn’t necessarily mean zero activity.”
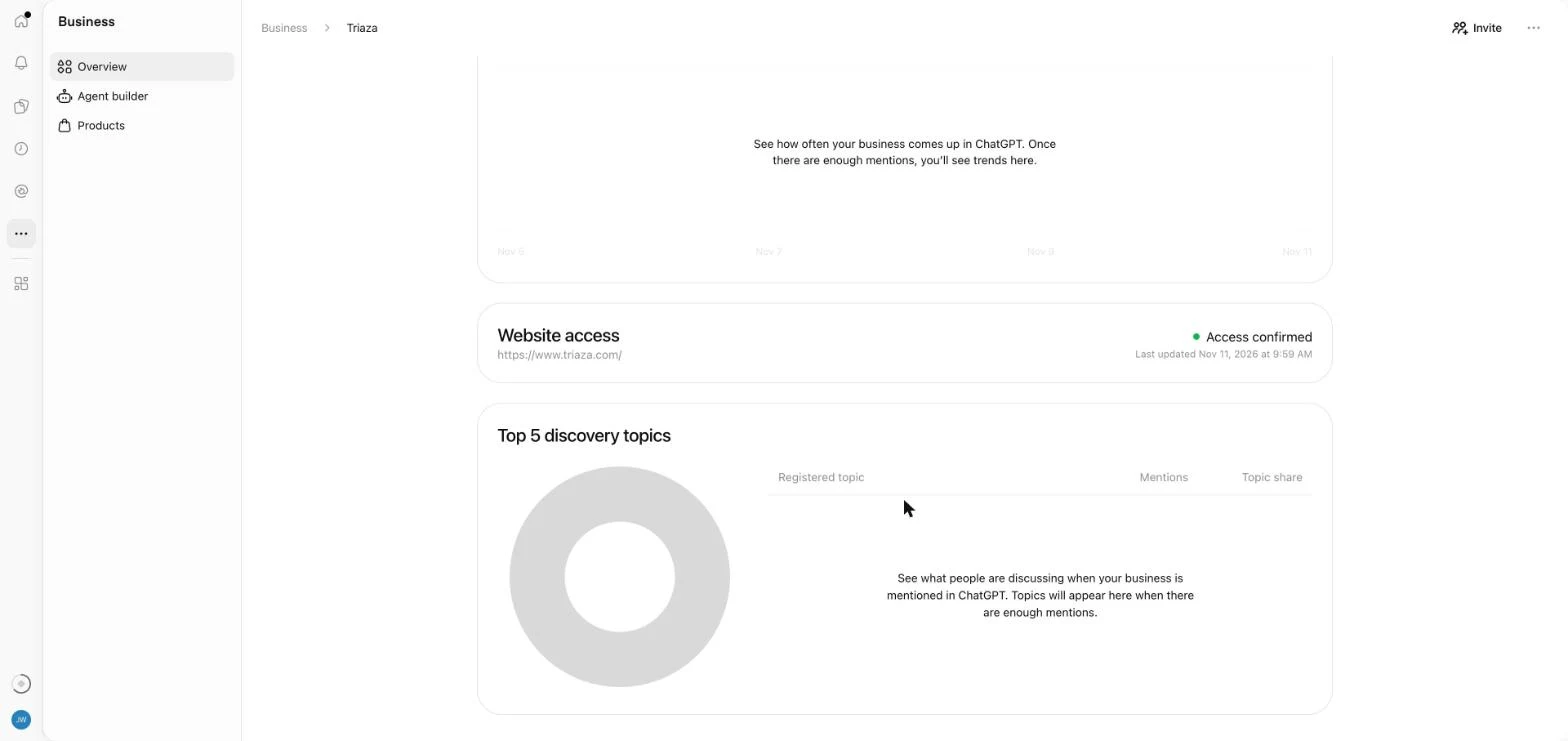
Further down the same page is a Website access card. It shows the site URL saved on your profile, a status, and a last-updated time. Ours read “Access confirmed.” OpenAI doesn’t document what the card checks, and we read it as OpenAI being able to reach the site. If yours says something else, find out whether your robots.txt, firewall, or CDN is blocking OpenAI’s crawlers before you do anything else. Our guide to technical SEO for AI search covers how to check which AI crawlers your site allows.
Step 8 (optional): Build a Business Agent
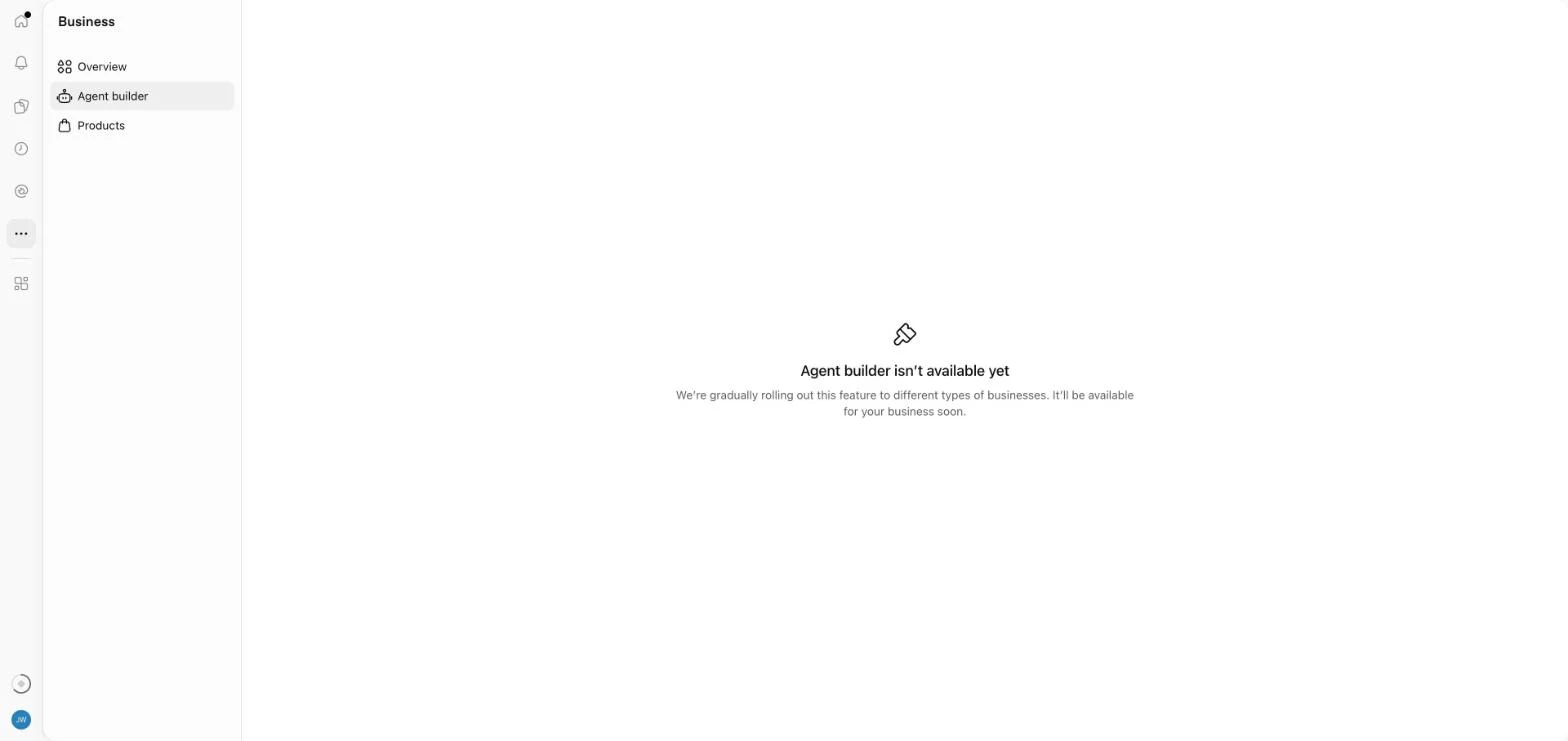
A Business Agent is a separate chat that answers customer questions from the information you supply. It’s available only to eligible ecommerce and online service businesses in the US with a website, and the business has to meet the industry requirements in OpenAI’s Business Agents Policy.
Plenty of verified businesses won’t have the option yet. Triaza is a marketing agency, and this is our Agent builder page:
If you do have access, OpenAI’s help article describes the steps. We couldn’t test them:
- Open the draft agent (Shopify setup may have created one) or create a new one.
- Review the information it will use, such as product details and your return policy.
- Preview it with a question customers really ask. OpenAI suggests “Can I return an item I bought on sale?”
- Fix the source information or instructions if the answer is wrong, and test again.
- Select Publish when you’re satisfied. Customers can only chat with a published agent.
The agent can explain products and policies and link to your site. It can’t complete purchases, make bookings, or look up a customer’s order.
Give your team or agency access
The admin who claimed the business can add people with the Invite button at the top of the business page, and can grant an agency access to manage the business or its agent. Each person should use their own ChatGPT account.
OpenAI warns against forwarding a personal claim invitation as a way of sharing access. For a business claimed inside a ChatGPT workspace, invitees may need to be members of that workspace. If an agency invitation is blocked, its advice is to contact OpenAI Support and ask what’s possible.
When something goes wrong
| Problem | What to do |
|---|---|
| Claim or Persona check is pending | Wait for the email. Don’t resubmit while a review is open. |
| Persona check failed or expired | Follow the email’s instructions. If Try again appears, resubmit with details that match your official records. |
| Business Hub says verification is incomplete after an approval email | Contact OpenAI Support with the step you were on, any error message, and a screenshot with sensitive details removed. |
| Someone else has claimed your business | Open the profile, select the more options menu (•••), then Dispute ownership, and verify through Persona. |
| You created a profile by mistake | Unpublished drafts can be deleted from the Overview page’s three-dot menu (Delete draft). OpenAI Support can’t delete, unpublish, or hide a published profile as part of a setup or ownership request. |
| A metric stays blank | It may be under the reporting threshold. If it persists, contact Support. |
Questions about claiming a business in ChatGPT
Does it cost anything to claim a business in ChatGPT?
Not at launch. OpenAI’s pages list no fee for claiming a profile, and you don’t need an Ads account or an Enterprise agreement. Advertising and Business Agents are separate from claiming.
How long does ChatGPT business verification take?
OpenAI doesn’t give a number. Its help article says review time varies and that you’ll get the decision, or a request for more information, by email. One test published in launch week saw a claim approved in about two hours, and other guides tell readers to allow longer. There are two reviews to get through: the claim, then Persona.
Do I need Shopify to claim my business?
No. Shopify is one of the verification methods OpenAI lists and one way to supply a product feed. Businesses without a Shopify store can claim a profile and, if eligible, build an agent.
Can I claim all of my locations at once?
Not currently. OpenAI says each distinct brand is managed separately, that claiming the main brand doesn’t claim its locations, and that central management across a parent company’s brands and locations isn’t available yet.
Will claiming my business make ChatGPT recommend it more?
OpenAI says there’s no guarantee. Claiming lets you manage the information you provide. It “doesn’t guarantee increased visibility” or give you direct control over ChatGPT’s independent recommendations.
Why haven’t my changes shown up?
OpenAI reviews edits before publishing them, and published edits can take time to appear in listings and answers. ChatGPT also draws on other sources, so a saved change won’t be reflected in every answer straight away.